


Hey there! I'm a supplier of longitudinal seam welding machines, and today I'm gonna walk you through the process of installing one. Whether you're a newbie in the welding world or a seasoned pro looking to set up a new machine, this guide will help you get your longitudinal seam welding machine up and running smoothly.
1. Pre - installation Preparations
Before you even start unpacking the machine, there are a few things you need to take care of. First off, find a suitable location for the machine. It should be a flat, stable surface that can support the weight of the machine. You don't want it wobbling around during operation, as that can lead to inaccurate welds and even damage to the machine.
Also, make sure the area has good ventilation. Welding produces fumes, and you don't want to breathe those in. If possible, set up the machine near an exhaust system or in an open - air workspace.
Check the power supply. Longitudinal seam welding machines usually require a specific voltage and amperage. Make sure your electrical outlet can provide the right power. If you're not sure, it's a good idea to consult an electrician.
2. Unpacking and Inspection
Once you've got the right spot and power supply sorted, it's time to unpack the machine. Carefully open the packaging and remove all the components. Check for any visible damage during shipping. If you find any, make sure to contact the shipping company and us right away.
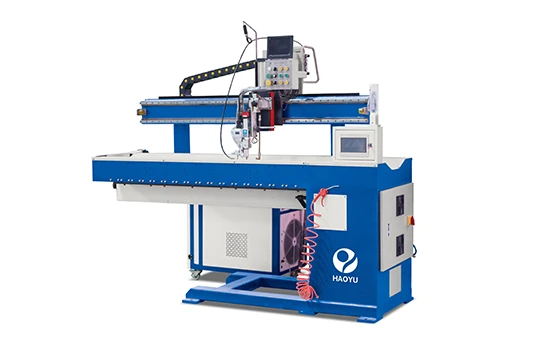
Look over all the parts. You should have the main welding unit, control panel, welding torch, and any other accessories that came with the machine. Refer to the user manual to make sure you have everything.
3. Assembly of the Machine
Now, let's start putting the machine together. First, attach the control panel to the main welding unit. There are usually bolts or screws for this. Make sure they're tightened properly, but don't over - tighten them as you could strip the threads.
Next, install the welding torch. This is a crucial part of the machine, so follow the instructions carefully. Connect the torch to the welding unit using the appropriate cables. Make sure the connections are secure to avoid any electrical issues.
If your machine has a worktable or a fixture for holding the workpieces, install it now. Adjust it to the right height and angle for your convenience. You want to be able to access the workpiece easily during welding.
4. Connection of Gas and Water Supplies (if applicable)
Some longitudinal seam welding machines, like Automatic TIG Straight Seam Welding Machine, require a gas supply for shielding. If yours is one of those, connect the gas cylinder to the machine using the gas hose. Make sure the connections are leak - free. You can use a soapy water solution to check for leaks. If you see bubbles forming at the connections, there's a leak, and you need to tighten the fittings.
If the machine has a water - cooling system, connect the water supply and drain hoses. Again, check for leaks. The water is important for keeping the machine cool during operation, so it's essential that the system works properly.
5. Electrical Wiring
Now, it's time to do the electrical wiring. This is a critical step, so if you're not comfortable with it, get an electrician to help. Connect the power cable of the machine to the electrical outlet. Make sure the wiring is done according to the electrical diagram in the user manual.
Connect any other electrical components, like sensors or additional controls. Double - check all the connections to make sure they're correct.
6. Calibration and Testing
Once the machine is assembled and wired up, it's time to calibrate it. Turn on the machine and go through the calibration process as described in the user manual. This usually involves setting the welding parameters like current, voltage, and welding speed.
After calibration, do a test run. Use a scrap piece of material similar to what you'll be welding in your actual projects. Start the welding process and observe how the machine works. Check the quality of the weld. If the weld looks uneven or there are other issues, you may need to adjust the parameters again.
7. Safety Checks
Before you start using the machine for real projects, do a final safety check. Make sure all the safety guards are in place. These guards are there to protect you from sparks, heat, and flying debris.
Check the emergency stop button. It should work properly. In case of any problems during welding, you can quickly stop the machine using this button.
8. Training and Familiarization
Even if you're experienced with welding, every machine is a bit different. Take some time to familiarize yourself with the controls and features of your new longitudinal seam welding machine. Read the user manual thoroughly.
If you have any questions, don't hesitate to contact us. We're always here to help you get the most out of your machine.
9. Other Types of Longitudinal Seam Welding Machines
We also offer other types of longitudinal seam welding machines, such as Double Straight Seam Welding Machine and Shaft Wings Straight Seam Welder. The installation process for these machines is similar to what we've discussed, but there may be some differences in the details. Make sure to refer to the specific user manuals for these machines.
Conclusion
Installing a longitudinal seam welding machine may seem like a daunting task, but if you follow these steps, you'll be able to do it successfully. Remember, if you run into any problems during the installation process, we're just a message or a call away.
If you're interested in purchasing a longitudinal seam welding machine or need more information about our products, don't hesitate to reach out. We're here to help you find the right machine for your needs and ensure a smooth installation and operation.

References
- Manufacturer's user manual for longitudinal seam welding machines
- Industry standards for welding machine installation and safety


